Photography lesson #1 – ISO Angelyn Bryce
The Exposure Triangle= ISO, Aperture or f-stop and Shutter Speed
ISO is the first thing you set before taking pictures. ISO used to be the speed of the film you bought. Now it is just another dial on your digital camera. It means sensitivity to the light. ISO numbers range from 100 to 1600 and above. The higher numbers are more sensitive to the light than the lower numbers. The problem with ISO is that the higher the ISO number, the more grain or noise you get in your picture (if you zoom in close you can actually see little dots in a grainy picture), so it helps to use as low an ISO number as you can. If you are in a low light situation you would want a higher ISO number such as 1200 and above. If you are out in the sun, you would use maybe 100 or 200. In the shade you might use 400.
Assignment:
1-Get a little notebook that you can carry around easily with your camera.
2-Find a low light area in your home and put your camera on P mode or Auto but without flash. Set your ISO to 100 and take a picture of a subject. Write down the settings of Shutter Speed and Aperture that the camera chooses if you can. Then change the ISO to 200 and take another picture and write down those settings. Do this again until you have shot a picture of every ISO number. Notice that as you choose a higher ISO number, the camera will choose a higher Shutter Speed number and maybe even aperture because the camera has more light to work with. Your pictures should also be less blurry from camera shake at the higher numbers, but also may have more grain or noise.
3-Now find a well lit area (by a window) in your home and do the same exercise over again. You will notice that shutter speeds and apertures change but that most of your pictures are still pleasing because of all the light coming in from your window. Post your favorite one on the blog.

ISO 400, f/4, 1/20

ISO 6400, f/4, 1/400
These are examples of ISO. Notice there is more camera shake or blur in the first but more noise in the second. Still the higher ISO is preferable and this shot actually had less lighting than the first.
Photography Lesson #2 Aperture or f/stop
Aperture refers to lens openings or a hole that opens up to let light into the camera. The smaller the f-stop or aperture number (say f/1.8, f/2.2 or f/3.2), the larger the lens opening is to let light in. So the larger the number (f/18, f/20 or f/22), the smaller the opening is.
The thing to remember about aperture is that the lower numbers give you less depth of field (or more blur) in the background and the wide open or higher numbers give you more depth of field (or less blur) in the background. So if you are shooting mountains you will want higher numbers. If you are shooting a child’s face you might want the lower numbers to blur the background.
Also the farther you are away from your subject the more depth of field you automatically have. So if you are shooting a football game from the stands with low light, go ahead and use a lower f-stop number to add more light into the scene because you are far enough away from your subject to still get clear shots. At 15 feet away, a child’s entire body will be in focus with an f-stop of 2.8, but if you move in closer to his face looking down and only couple of feet away, his face will be in focus but his body will be blurred. If you get really close you can have one eye sharp and one eye blurry.
Different lenses give you different f-stops. Fixed or prime lenses (that don’t zoom) are typically sharper and can give you lower f-stop numbers. My 85mm 1.8 lens will stop all the way down to f/1.8. My zoom 24-105mm will only stop down to f/4. So your ability to get more blur in the background also depends on what lens you have.
This picture of Joseph is shot with an ISO 400, f/1.8, and a shutter speed of 1/400. He is facing my south family room window with the front door behind him. There was a light blur in the upper right corner that was my front room window but I photo shopped it out. Notice that his arm is blurry because it is a little farther behind his face, where I focused.

Most point and shoot cameras have very little ability for less depth of field or blur, but they will give you great focus and distance shots.
Assignment:
Set your ISO and then put your camera on A or Av which means aperture priority. This will let you pick the aperture and the camera will do the shutter speed. Set it to the lowest f-stop or aperture number. You will want a subject that is basically stationary for this assignment, a posing child or an object and you will want good lighting. Early morning or evenings are the best light in which to take pictures outside. Or if you want to do it inside, place your subject by or facing a bright window. Place your subject with some kind of background and move in close. You will want to focus on the same spot each time you take a picture. Then take a picture and write down in your notebook the ISO, Aperture or f/stop and the shutter speed. Move the aperture up a stop and take another picture and so on until you have taken pictures of all the f/stops on your camera and recorded them all in your notebook. You will see the background come into focus as you move your aperture or f/stops up.
Photography lesson #3 Shutter Speed
The Shutter is an opening in the camera that allows light into the camera (rather than a lens opening like aperture) which then exposes the film or digital media. The faster the shutter speed or higher the number (ex. 1/5000 which means 1/5000 of a second), the less time the shutter is open and that means that a less amount of light is allowed to enter. The slower the shutter speed or lower numbers (ex. 1/25), the longer it is open and the more light is allowed into the camera.
Shutter speed affects action or movement. The longer the shutter speed is open, or the lower the number, the more movement your picture will capture. So if you want to capture clear, sharp images of movement, you will want a higher Shutter Speed. If you want to see movement or blur then you would use a lower shutter speed. Tripods are recommended at the lower shutter speeds such as when you see a “ after the number. At this point you are not even in whole numbers. A good example of this is when you see waterfalls that look misty, blurry and soft. They have been taken with a tripod and at a very low shutter speed.
Generally I use around 1/100 for indoor low light shots with not too much movement because I need the camera to let in more light, but outside on a bright day I use much higher shutter speed numbers because there is more available light and I need less time to let it in.

ISO 400, f/4, 1/80
This picture shows a little blur in the hands and feet. What I should have done was up the ISO so that I could use a higher shutter speed to get a sharper, clear action shot. Still it is kind of fun to see a little movement or blur because it implies action.
Assignment 1:
Set your ISO first, and then put your camera on S or Tv which means shutter speed priority. The camera will automatically set the aperture. Start at a low shutter speed like 1/30 and take a picture of a moving subject, record all your settings and then move your shutter speed up a stop and take another picture until you have recorded them all.
Notice that if your pictures look blown out or too dark, you might need to change the ISO accordingly. Higher ISO’s outside, when you don’t think you will need it, actually gives you more playing room with your shutter speed. Also, a faster moving subject means you will need faster or higher shutter speeds.
Assignment 2:
Shoot a photograph that shows creative motion.
Photography Lesson #4 Shooting In Manual
This is where you put it all together. Up until now, we’ve selected either aperture or shutter priority and let the camera do the rest. Now we’ll adjust everything manually. The meter is what tells you how much light is coming into the camera. On an SLR, you push your shutter button half way down and look through the view finder and you will see the meter scale. The arrow below the horizontal line shows you where you are at. By adjusting the ISO, aperture or shutter speed dials the arrow will move. If the arrow is to the left of the middle then you are underexposed by however many stops it is indicating. If your arrow is to the right of center then you are overexposed. When the arrow is in the center you will have one of many correct exposures. That is because ISO, aperture and shutter speeds all affect each other when changed.
Depending on what you are shooting and what your priority is such as depth of field or movement you will decide where you want your ISO, aperture and shutter speed to be. I typically set my ISO first and then set the aperture I want and then see what shutter speed I get for the correct exposure and if it is acceptable or not. When I am shooting action shots, I start with ISO and move to shutter speed next.
One thing to remember about metering is that cameras all come set to expose at a grey color. So when you shoot bright white such as snow on auto you will often get a grey colored snow because the camera has underexposed the picture. Likewise if you shoot something black or dark on auto, the camera will tend to overexpose the picture. This is something you will want to remember to compensate for. I overexpose snow pictures by one or two stops and underexpose really dark backgrounds one or two stops. The cool thing is you are now in control and you can check your pictures as you go and compensate when necessary!
Also there are different ways your camera will meter such as evaluative, partial, center weighted or spot metering. I prefer spot metering so I can meter where I am focusing and I know that spot will be metered correctly. You will have to read your manual to see how to change your preference on metering. If your camera doesn’t have spot metering, partial is the next closest. Try them all out and see which one works best for you.
As you photograph in manual, you will find that your meter jumps around a lot because the light often changes. Just remember to keep looking at your pictures every so often and keep on correcting the metering. Pretty soon it will become second nature to you.
Assignment:
Choose a subject inside, put your camera mode on M for manual and set your ISO. Then set your aperture and then look into the viewfinder and press the shutter button half way down to meter the light. Set your shutter speed accordingly until you see that you have a correct exposure. Take some pictures. Then do the same assignment outside. Congratulations, you are shooting in manual! It will seem cumbersome at first but once you get used to it you will never go back! Your pictures will be better than ever before, but you do need to practice until you have it down, so don’t stop!

ISO 400, f/10, 1/320
I overexposed this snow shot from what the meter was telling me by 2 stops.
Photography Lesson #5 – Lighting
There are different kinds of light:
-Hard Light - That directly overhead sunlight that creates harsh shadows
-Soft Light – Indirect light such as an overcast day, in the shade, inside by a light window, and early morning or late afternoon light.
-Natural Light – Soft light but comes from the sun
-Front Light – Light shining directly into the face or subject (I like to face my subjects directly toward a bright window).
-Side Light – Light shining onto the side of the subject
-Back Light – Light shining from behind the subject
-Back Light – Light shining from behind the subject
Side lighting

Front lighting (notice the catch lights)

The best light is soft, natural light of course and it can come from the front, side or back. But even soft, natural light can be different. For example early morning light tends to be cooler and blue and late evening light tends to be warmer and more yellow.
Back lighting with flare (up)

Soft, natural light (down) – open shade

Back Lighting is hard to achieve but can be very rewarding. It gives you a softer look about the subject and colors are a little more washed out but they are very popular and can be quite artistic. Try catching to sun peeking through some tree branch or most of the sun hidden behind the subject. Flare can make a picture more interesting. Just make sure that the flare is not on the subject’s face. I will typically take a shot or two and see where the flare is and then change it by moving a bit if I need to.
From here on out it would be a good idea to explore your house and discover where the best light is and at what time of day. Also start noticing light and where it is coming from and what it does to a subject. This will help you when you are taking pictures. You need to just notice where the light is coming from and how to best place your subject.
Catch lights are those lights that you see in a subject’s eyes that just lights them up. If you place them just right toward the light source you will see those lights. You will often see yourself taking their picture in their eyes. It would have to be a close up portrait or they wouldn’t be close enough for you to see the catch lights.
Catch lights

Indoor lighting tips:
1- Turn on all the lights and open all the blinds all the way to allow as much light in as possible. You can even open up a door.
2- Bring your subject to the light such as facing a window but be careful not to put your own shadow in the way.
3- You can raise your ISO, open your aperture or f/stop and lower your shutter speed. All of which will let more light in.
Outdoor lighting tips:
1- Shoot at the best time of day, early morning or late evening.
2- Watch for overcast days. You can shoot all day long.
3- Find open shade to take your photo’s in which means lots of light. Too much shade can cause problems.
4- Notice how the light is hitting your subject and whether or not you have harsh shadows.
5- Use fill flash for bright, sunny days.
Assignment:
Practice front, back and side lighting both inside and outside. Practice getting some catch lights.
Photography Lesson #6 – Composition
First of all, let me just say that rules can easily be broken in photography and look great. These are just some rules that can help make some of your pictures look even better and more creative.
1- The rule of thirds- This rule says that you don’t put your subject right in the middle of your picture. You would put it in the top right, one third corner, the top left, one third corner, bottom right or bottom left, one third corner. And, yes Abby is singing “Oh what a Beautiful Morning”. Also the sky and the clouds are fake. I will show you how to do this later.


2- Patterns and Shapes- It’s fun to look for patterns and shapes that make pictures more interesting. You can find patterns everywhere, interesting doors or windows with patterns, wood working, looking straight up from the bottom of a tower or building, fallen leaves, flowers, etc. and you can create your own. I have some fun fabric backgrounds that anyone is welcome to borrow! You can see shapes that make your photograph more interesting. Squares, rectangles (buildings), triangles (mountains or sets of three) and circles (flowers and a setting sun) are everywhere in our world. Start to pay attention to them.

3- Texture and Contrast- these are also everywhere in our world and make great photographs. Look for peeling paint, old wood, old stone, dirt, rocks etc. Notice contrast. If your subject is light look for a dark background. If your subject is dark, look for a light background in order to make them stand out.
4- Lines- Lines are fun and they can be straight or curved. Lines can be horizontal, vertical, diagonal or converging. Look for lines that lead the eye through your photograph such as a curving road or path. Straight lines that go diagonally through your photograph also lead the eye and can be very interesting.
5- Framing- Look for ways to frame your subject such as a doorway, a window, foliage, an arch, a tunnel or even other people.
6- Perspective- You can get a completely different picture lying down on the ground, looking straight at or standing up high looking down at the same subject. None of them are wrong. They are just different.
Texture, Color and Rule of Thirds

Shapes, Texture, Perspective

7- Balance and Symmetry- I tend to like symmetry in my horizontal pictures and most of my vertical ones, but once in a while I like to throw something off balance with a vertical picture. It can make things a little more interesting.


Framing, Color, Texture, and Lines

Lines, Asymmetry, and Contrast

8- Color- We all love color in our photographs. The best photo shoots are the ones with lots of great colors, whether it is in the clothing, painted structures, flowers or whatever. Look for color and use it in your photographs.
Assignment:
List all the compositional elements in your notebook and practice taking pictures that incorporate one or more of each of them. There is the rule of thirds, patterns and shapes, textures and contrast, lines, framing, color and perspective. Then try a little asymmetry.
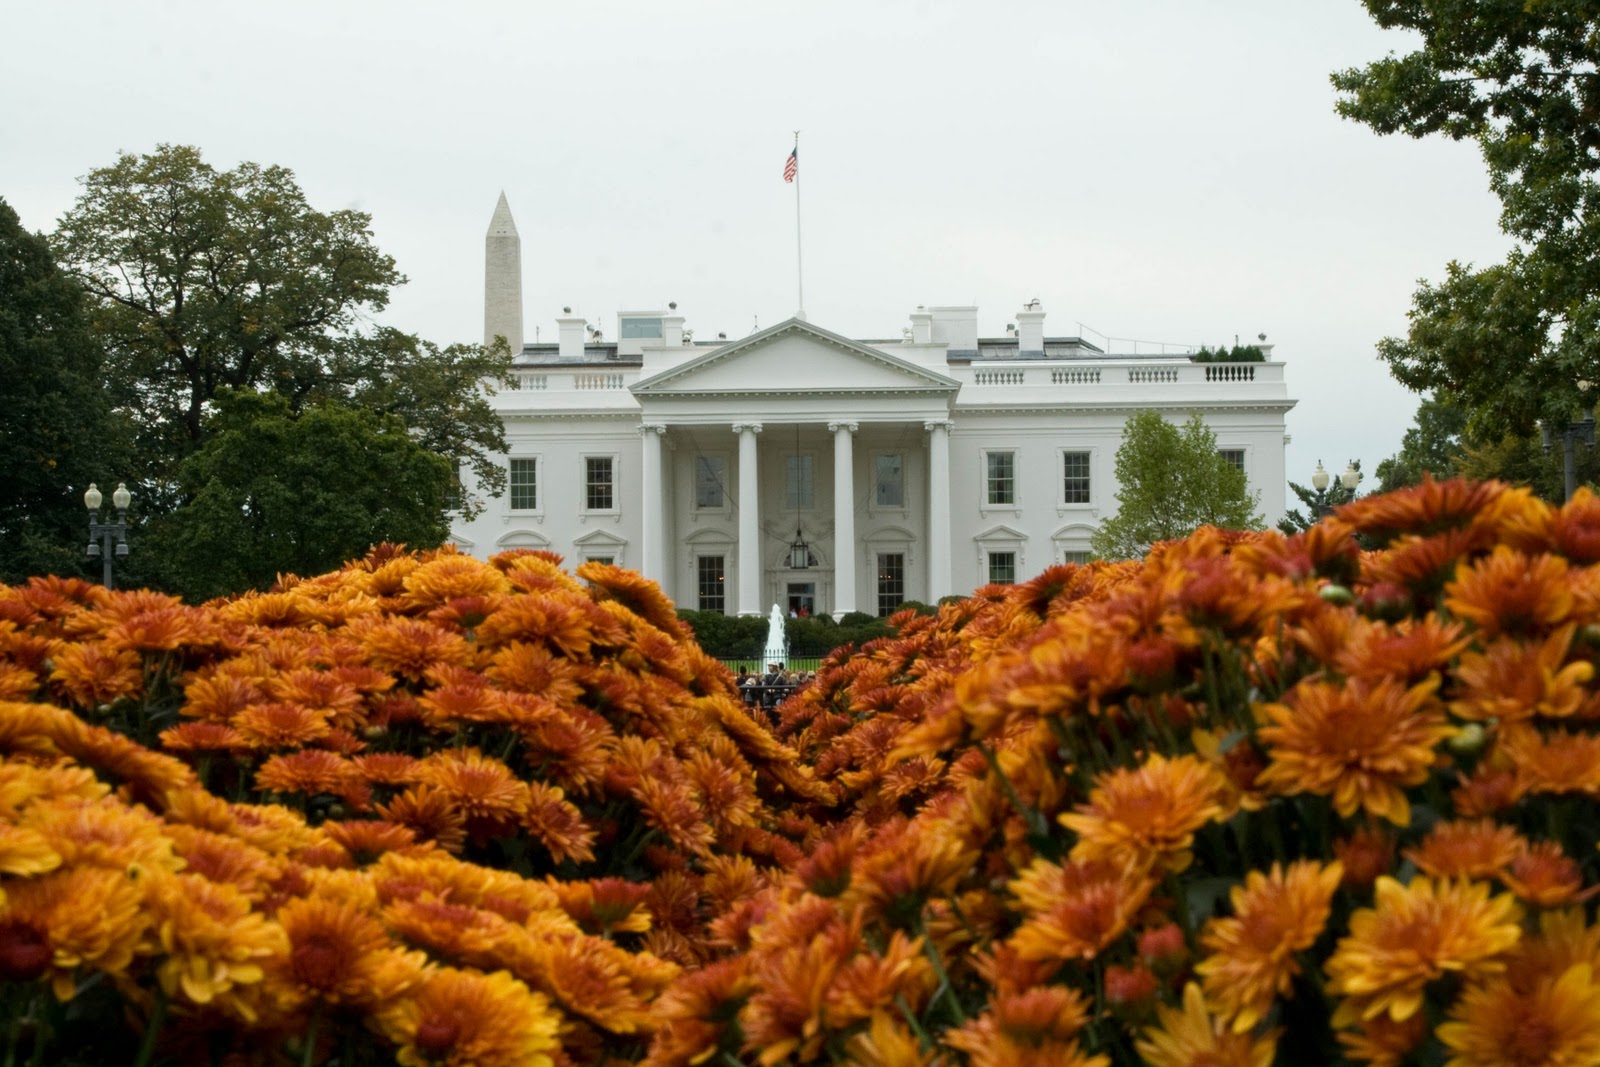
Filling the frame is another way to improve your compositions. After taking a picture of a scene, take a step closer and fill the frame with something interesting in your picture. You will be surprised at how much fun that can be! Another trick is to fill the bottom of the picture with something. This works especially well with vertical pictures. I got this one of the White House by lying down on my stomach.
Photography Lesson # 7 – The photo shoot
1- Location- In your notebook, start keeping a list of locations that you know of or see just driving around. You’ll be surprised at how many there are right around you. Make it a point to take your kids to new places and bring along your camera. For my birthday I like to do a photo shoot somewhere new since that is the time that all the blossoms are out. It just makes me happy.
2- Portraits- When taking portraits of people, the idea is to capture emotion and personality. Think of all the emotions that people go through (happy, sad, serious, pouty, laughing, etc) and use them to make a connection with your subject. For just one person take close up’s or face shots and also get full body shots. Try to capture at least one where you concentrate on the eyes and getting some great catch lights. Make sure you focus correctly. I also like to use smile, smile just a little, and don’t smile etc.
3- Candids- Candid’s can be some of the best shots you will ever get. They tell stories about real life. To get great candid’s, you might need to be patient and use longer lenses so that they don’t realize you are even taking pictures. You can just wait for interactions or you can tell a joke or just ask them to laugh. You can also stage candids. If you are doing more than one person, have them interact with each other. Smile, talk, laugh etc. You can have subjects hold hands, kiss, touch noses, cover their face with their hands, and throw hands in the air. You can have them move around, jump, look away from you, talk to you etc. You’ll be amazed at what great pictures you can get this way.
4- Props- These can be so much fun. The possibilities are endless. Let me just throw a few out there: food, fruit, candy, giant suckers, colorful soda’s, bubbles, dolls, toys, bright hair flowers, umbrella’s, hats, boots, scarves, blankets, suitcases, baskets, chairs, ladders and so much more!
5- Group shots- These can be difficult but very rewarding. The trend in photography right now is not too posed. The look is that everyone is standing or sitting a little differently from everyone else. Maybe leaning against a wall, some holding hands and not dressed alike. That doesn’t mean that the traditional posed and all dressed alike is wrong. It’s just not the trend in photography right now.
Candid

Location, Props

If you take Alpine Highway to American Fork and make a right onto State St. Look over to your right and you will soon see this little alley way between the stores. This is one of my favorite pictures ever and it was all about location and props. This other picture is my favorite because it has a special story behind it. This was Rick’s day to go into the MTC and he took Joseph out to the bus for the last time. Of course, Joseph didn’t know that he wouldn’t be seeing Rick again for two years, but I did. I captured Joseph’s happy face looking back at Rick and Rick’s reflection in the bus window saying goodbye.


This photo illustrates the relaxed, more natural looking trend in family photos
Assignment:
Do a photo shoot in a new location. Take a single portrait, face only and a whole body portrait using some kind of prop. Take a group shot and then take some candid shots.
Photography lesson# 8- On Camera and External Flash
On Camera flashes are built in flashes that automatically go off when the camera meter senses that it is too dark. Some are built right into the camera and some are pop up flashes. Most photographers try to avoid using these because they create “deer in the headlight” type photos with dark backgrounds. I know that I have never been real happy with mine, but I would rather have those pictures than not. All those years that I was using mine, I wish I would have known of a few tips that can make them more helpful.
On Camera flashes:
1- One of the best ways to use on camera flashes is for fill flash. Most cameras have fill flash, just make sure you read your manual and know how to manually turn it on. Fill flash is when you are shooting on a bright sunny days and you can see that there will be dark shadows on your subject. You will manually turn on your fill flash and be able to brighten up those dark shadows. Flash strengths are all a little different though and you will have to pay attention to how close or far away you are, to get the correct amount of fill.
2- Other great uses for on camera flashes are to stop or freeze motion of nearby moving subjects that are in low light or to emphasize a foreground subject on a gray or overcast day. That would include brightening a subject in front of a sunset.
3- To stop the motion of falling rain drops or snowflakes.


Emerald took this picture with her point and shoot
External Flashes:
An external flash is one that you can manually connect to the top of your camera, but then the flash on top will swivel. This makes is possible to diffuse the light in the room. You can bounce the light off of different walls or even the ceiling. You will want to make sure it is the right model for your camera.
So how do you meter manually with an external flash? You would set your ISO and aperture like you normally would and then set your shutter speed last. Your flash will light up your foreground but your shutter speed is going to decide what the other ambient light in the room looks like. If you want to have a more natural lit up back part of the room, then you will want a slow enough shutter speed to lighten it up. If you have a faster shutter speed then your foreground subject will be lit up and the room darker. The camera’s have a maximum sync mode of around 250 so you won’t be able to set your shutter speed any higher than that. I like to try around 1/25 at first and then check my picture and compensate. Remember that your flash will be helping your shutter speed freeze motion and so you won’t have the blur you might have otherwise had at the slow of a shutter speed.
If you have an external flash you will want to set it to take into consideration the ambient light in the room and so if you have a Nikon it would be TTL BL or Canon ETTL. You can also set the light compensation on the flash. Start at 0 and then see if you need to go higher or lower. Mine goes up and down in 1/3 increments. So I just experiment until I like it.


These photos were taken at night with the flash bounced off the back wall behind me. ISO 640, f/4, 1/60
I haven’t had my flash very long and so I still have a lot of experimenting to do with it, but so far I have loved the results! I know you can buy diffusers that attach to your flash also to give you that soft look.
Reflectors: Reflectors reflect light onto the face to give you that little extra boost you might need. You can buy reflectors. Different colors will give you different looks; you can use fences, doors, walls or other things to reflect light. For example, we could have used that white door on the White’s shed when the light was shining on it. You can also use just plain, old foam or poster board. Just remember that distance and angle is what matters most when using reflectors. If it’s too close it will wash out the face. If it’s too far away it won’t help you. You would also want to make sure that the angle is such that the light reflects evenly on the face.


The flash was bounced off the ceiling at night with Abby’s photo – ISO 640, f/4, 1/60 and a silver reflector was used with Megan’s in the morning with the room lit fairly well, but she was not facing the window- ISO 640, f/4, 1/25 (can you tell I sometimes forget to change my ISO?)
Assignment:
Experiment with whatever flash you have. If it is on camera, try some fill or rain shots. If you have an external flash, experiment with bouncing it off the different walls and the ceiling. Try using a reflector even if it is only some poster board.
Some Extra tips-
1- When shooting people with glasses, have them angle their heads to one side or the other and you won’t get glasses flare. Or you can take two pictures of them one with glasses and one without and fix it in photo shop. Scott Kelby’s book tells you how.
2- Try setting up your sprinklers on some flowers or some subject and get some rain shots. Try stopping the rain with flash and then try a longer shutter speed without the flash and maybe a tripod to get long raindrops.